Snowflake 01 3D Layered SVG Cut File
In the realm of digital crafting and small-batch manufacturing, the transition from a static digital design to a tangible, high-quality physical product requires precise planning and execution. The Snowflake 01 3D Layered SVG Cut File represents a sophisticated asset designed for this exact purpose. It is not merely a decorative image; it is a structured blueprint for creating depth, dimension, and visual impact through layered construction. Whether you are a hobbyist looking to elevate home decor or a small business owner aiming to produce premium seasonal merchandise, understanding how to integrate this file into your workflow is essential for achieving professional results.
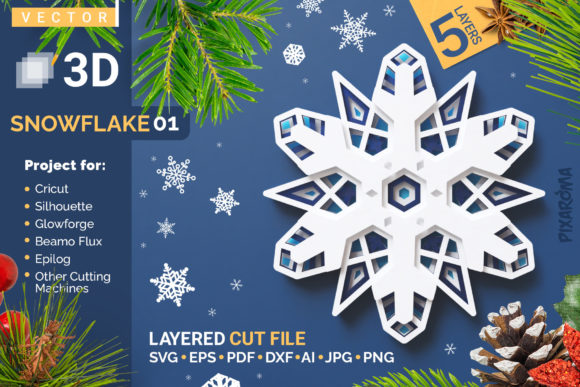
This digital asset allows creators to cut and craft beautiful 3D snowflakes from various materials, including paper, cardstock, plywood, and other compatible substrates. The design is versatile enough to stand alone as a striking piece of art or to be framed within a complementary shadow box to emphasize its intricate details. However, the true value of the Snowflake 01 file lies in its multi-layer architecture, which demands a specific approach to assembly to realize its full aesthetic potential.
Understanding the Architecture of the Design
The core feature of the Snowflake Version 01 - 3D Layered SVG Cut File is its five-layer design. Unlike single-plane vector graphics that result in flat, two-dimensional outputs, this file contains distinct layers that must be separated, cut individually, and then reassembled with spatial separation. This structural complexity is what differentiates a standard craft project from a piece of dimensional artwork. Each layer contributes to the overall silhouette and internal detailing of the snowflake, creating a mandala-like effect that changes depending on the viewing angle and lighting conditions.
For professionals and serious hobbyists, recognizing the importance of layer order is critical. The design relies on a specific stacking sequence to ensure that inner details are not obscured by outer layers and that the symmetry remains intact. The provided guide accompanying the digital file serves as the primary reference for this organization. Deviating from this order can result in a misaligned final product, where the delicate interplay between layers is lost. Therefore, the initial phase of working with this file involves careful verification of the layer stack before any material is consumed.
Material Selection and Compatibility
The success of the final product is heavily dependent on the choice of materials. The Snowflake 01 file is compatible with a wide range of media, but each material presents unique challenges regarding thickness, rigidity, and adhesion. Cardstock and heavy paper are ideal for beginners due to their ease of cutting and lightweight nature. These materials allow for the use of double-sided adhesive foam dots, tabs, or tape to create the necessary spacing between layers without adding excessive weight or bulk.
For more durable or commercial-grade applications, plywood and acrylic are excellent choices. These materials offer longevity and a premium feel, making them suitable for gifts, retail items, or permanent installations. However, working with wood or acrylic requires different handling techniques. Because these materials may vary in thickness, standard paper spacers might not provide sufficient height. In such cases, using acrylic, foam, or specialized wood spacers is recommended to maintain the intended three-dimensional profile. It is crucial to measure the thickness of your chosen material beforehand to determine the appropriate spacer size, ensuring that the snowflake stands upright and does not collapse under its own weight.
Workflow Integration: From Digital to Physical
Integrating the Snowflake 01 3D Layered SVG Cut File into a production workflow involves several key stages: preparation, cutting, and assembly. Efficiency at each stage ensures consistency across multiple units, which is vital for those producing batches of items.
Preparation and Software Setup
The process begins with downloading the digital file to a computer. Once acquired, the file must be uploaded to compatible cutting software. Most modern cutting machines, such as Cricut or Silhouette devices, work seamlessly with SVG formats. Before sending the file to the cutter, it is advisable to inspect the design in the software interface. Verify that all layers are present and correctly named. If you are preparing to cut multiple copies, arrange the layers efficiently on the virtual mat to minimize material waste and cutting time. This step also allows you to adjust scale if needed, though it is important to note that scaling down too much may cause intricate details to become difficult to assemble or visually indistinct.
Cutting Execution
Using your cutting machine, cut each layer separately. While some workflows allow for nesting layers to save time, for a 3D layered design like Snowflake 01, cutting each layer individually is often preferred to prevent shifting or misalignment during the ejection process. Ensure your blade settings are calibrated for the specific material being used. For cardstock, a light pressure setting is usually sufficient, whereas plywood may require multiple passes or higher power settings. Consistency in cutting quality is paramount; jagged edges or incomplete cuts will disrupt the smooth flow of the design and complicate the assembly process.
Assembly and Dimensional Construction
The most critical phase of the workflow is assembly. The goal is to introduce height and depth without compromising the structural integrity of the snowflake. For cardstock layers, the use of double adhesive foam dots, tabs, or tape is highly recommended. These adhesives leave space between each layer, allowing light to pass through and cast shadows that enhance the three-dimensional look. By sticking each layer on top of each other with this spacing, you create a cascading effect that mimics the complexity of real ice crystals.
A common mistake in this process is relying solely on liquid glue. Using only glue tends to flatten the layers against one another, eliminating the desired 3D effect and resulting in a dull, two-dimensional appearance. To preserve the height and dimensional quality of the mandala, always opt for spacers or thick adhesives. For wood layers, applying a thin bead of glue combined with physical spacers (such as small pieces of foam or extra wood) can secure the structure while maintaining the necessary gap. This hybrid approach ensures that the layers remain stable while still projecting outward.
Quality Control and Final Presentation
Once the layers are stacked and adhered, a brief quality control check is necessary. Inspect the alignment of the layers to ensure they are centered and symmetric. Check for any excess adhesive that may have squeezed out, which can be gently removed with a damp cloth or tweezers. The finished product should hold its shape firmly and display clear definition between each of the five layers.
The final presentation of the snowflake can vary based on the intended use. As mentioned, the piece looks great as is, particularly when displayed against a contrasting background. However, framing the snowflake inside a complementary shadow box can significantly enhance the artwork. A shadow box provides additional depth, allowing the layers to breathe and casting dynamic shadows that change throughout the day as sunlight moves. This elevates the snowflake from a simple craft item to a gallery-worthy decorative piece.
Strategic Applications for Creators and Businesses
For entrepreneurs and content creators, the Snowflake 01 3D Layered SVG Cut File offers several strategic advantages. It fits naturally into seasonal marketing campaigns, holiday product lines, and educational workshops. Its modular nature allows for customization; users can experiment with different color palettes, material combinations, or even add personal touches like glitter or metallic finishes to each layer.
In an educational context, this file serves as an excellent tool for teaching principles of geometry, symmetry, and spatial reasoning. Students can engage with the technical aspects of digital fabrication while appreciating the artistic outcome. Similarly, for bloggers and influencers, the process of assembling the snowflake provides rich content opportunities. Tutorials, time-lapse videos, and behind-the-scenes glimpses of the layering process can drive engagement and showcase expertise in the crafting niche.
Ultimately, the value of the Snowflake 01 file extends beyond the final object. It represents a streamlined method for producing high-impact, personalized decor. By adhering to best practices in material selection, precise cutting, and thoughtful assembly, creators can consistently deliver products that meet high standards of quality and aesthetics. This attention to detail not only satisfies the end-user but also reinforces the creator’s reputation for craftsmanship and reliability in a competitive market.